こんにちは。AIR Design for Apps事業部 iOSチームのデニスです。ファッション・アパレル通販アプリの開発を担当しています。
SwiftUIはiOSエンジニアの間でかなり人気が高まっているフレームワークですが、多くのプロジェクトではまだUIKitが使用されています。最初のiPhoneが登場した時にiOSの開発が始まって以来、最も使われたViewControllerはテーブル形式の表示画面だと思います。UITableViewの作成は簡単ですが、セルのデキュー、セクションやヘッダなどの部分を実装するため、やはりボイラープレートコードが多くなり、気づかずにViewControllerが大きくなってしまいます。私のプロジェクトでも同じ問題があり、最近はUITableViewの代わりにUITableViewDiffableDataSourceを使用し始めました。
UITableViewDiffableDataSourceの違い
UITableViewと比べてみると、UITableViewDiffableDataSourceで大きく変わった点はSnapshotとHashable (ハッシュ可能なItemIdentifier) の導入です。以前の実装ではUITableViewCellをデキューしたい時に、numberOfSections、numberOfRowsInSectionとcellForRowAtを使用し、UITableViewを更新するためreloadDataを呼び出す必要がありました。これらのメソッドはSnapshotの導入によって非推奨となりました。UITableViewDiffableDataSourceに関しては以下の例を見てもらうのが分かりやすいと思います。サンプルアプリとして買い物リストを作ってみましょう。
Step 1: プロジェクトの準備・データモデル作成
Storyboardなしのプロジェクト作成で実装を容易にするため、まず基本的なカスタムセルを追加します。
class ProductCell: UITableViewCell {
    let label = UILabel()

    override init(style: UITableViewCell.CellStyle,
                  reuseIdentifier: String?) {
        super.init(style: style, reuseIdentifier: reuseIdentifier)
        label.translatesAutoresizingMaskIntoConstraints = false

        contentView.addSubview(label)
        label.font = .systemFont(ofSize: 15)
        label.textColor = .darkGray

        NSLayoutConstraint.activate([
            label.leadingAnchor.constraint(equalTo:
                                            contentView.leadingAnchor,
                                           constant: 20),
            label.centerYAnchor.constraint(equalTo:
                                            contentView.centerYAnchor)
        ])
    }

    required init?(coder: NSCoder) {
        fatalError("init(coder:) has not been implemented")
    }
}
前に述べたように、UITableViewDiffableDataSourceのアイテムに対応するデータモデルがHashableに適合している必要があるので、ハッシュ可能なStructを追加します。この例ではnameだけを使用します。
struct Food: Hashable {
    let name: String
}
今回の商品は果物なので、まずFoodTypeを作成し、アイテムをハッシュ可能なFoodに設定します。例としてはstandardFoodのcaseを追加します。
enum FoodType {
    case standardFood
}

enum ProductItem {
    case product(Food)
}
次はUITableViewControllerに取り掛かりましょう。
Step 2: DiffableDataSource
DataSourceとSnapshotを実装する前にベーシックなUITableViewControllerを作成し、買い物リストの配列を追加します。一つ前のステップで作成したセルもregisterします。
class ViewController: UITableViewController {
    private let foodArray = [Food(name: "Apples"),
                             Food(name: "Bananas"),
                             Food(name: "Oranges"),
                             Food(name: "Beef"),
                             Food(name: "Pork")
]

    override func viewDidLoad() {
        super.viewDidLoad()
        navigationItem.title = "Shopping List"
        navigationController?.navigationBar.prefersLargeTitles = true
        tableView.register(ProductCell.self,
                           forCellReuseIdentifier: "ProductCell")
    }
}
さて、次はどうすれば良いでしょうか。まずDataSourceを作成したいのですが、UITableViewDiffableDataSourceの内容を確認すると、SectionIdentifierTypeが必要そうです。では、セクションとアイテムの列挙型を作りましょう。
このままでDataSourceを追加することができます。ソースを保持する変数が必要なので、まずprivate lazy varを追加します。
private lazy var dataSource = configureDataSource()
次のステップでDataSourceの関数を作成したいと思います。読みやすくするためにDataSourceのtypealiasを使用し、戻り値の型としてconfigureDataSourceに追加します。UITableViewDiffableDataSourceの期待値がtableView、indexPathとCellProviderなので、直接Foodを使用し、ProductCellとしてデキューします。ラベルがありますので、簡単にitem (Food系) のnameをテキストに追加することができます。
private typealias DataSource =
    UITableViewDiffableDataSource<FoodType, Food>

private func configureDataSource() -> DataSource {
    return UITableViewDiffableDataSource(tableView: tableView,
                                         cellProvider: { table, index, food in
        let cell = table.dequeueReusableCell(withIdentifier: "ProductCell",
                                             for: indexPath) as? ProductCell
        cell?.label.text = food.name
        return cell
    })
}
DataSourceを作成しましたので、Snapshotを作りましょう。
Step 3: SnapshotでUITableViewを更新
DataSourceと同じように、まずNSDiffableDataSourceSnapshotのtypealiasを作成します。
private typealias Snapshot =
    NSDiffableDataSourceSnapshot<FoodType, Food>
Snapshotはまだ何の機能もありません。UITableViewにデータを入れる為の関数を実装していきましょう。NSDiffableDataSourceSnapshotを確認すると、SectionIdentifierTypeとItemIdentifierTypeが必要なようです。以前に追加したProductSectionを使用して、簡単にappendSectionsに追加することができます。appendItemsのためfoodArrayをmapし、Snapshotが完了しました。
private func createSnapshot() {
    var snapshot = Snapshot()
    snapshot.appendSections([.standardFood])
    snapshot.appendItems(foodArray.map { $0 })
    dataSource.apply(snapshot, animatingDifferences: false)
}
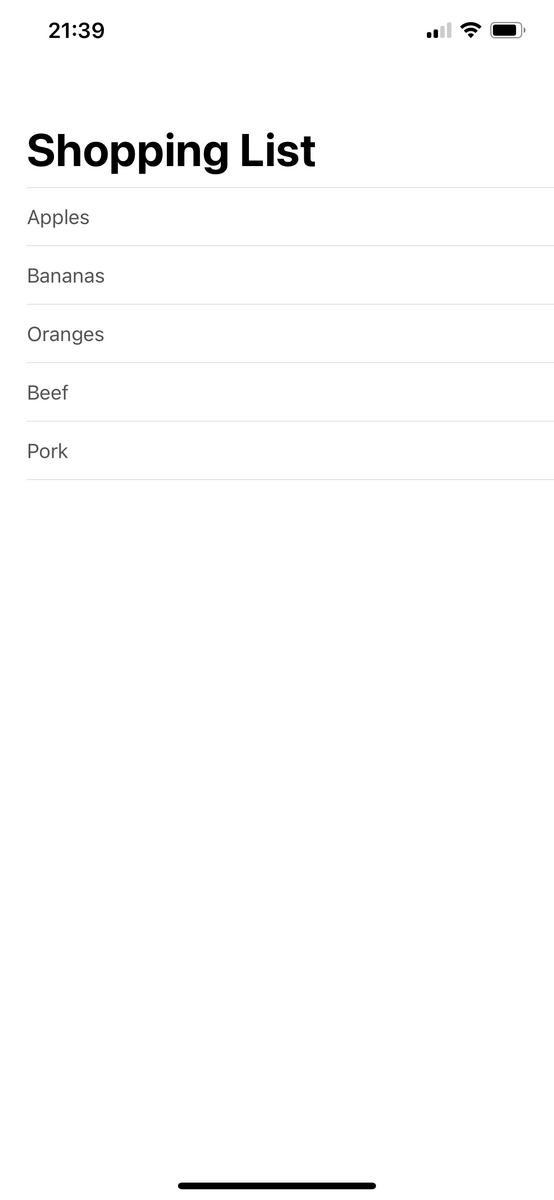
最後にviewDidLoadにcreateSnapshotの関数を追加することです。結果は以下の通りになるはずです。
Step 4: Sectionで分けたい
ここのままでは果物と肉が一緒でわかりにくいですね。セクションを追加して食品の種類を分けて、DataSourceを改善しましょう。まずProductCellと同じく、カスタムヘッダを追加し、viewDidLoadの中にregisterします。
class SectionHeader: UITableViewHeaderFooterView {
    let label = UILabel()

    override init(reuseIdentifier: String?) {
        super.init(reuseIdentifier: "SectionHeader")
        label.translatesAutoresizingMaskIntoConstraints = false

        contentView.addSubview(label)
        label.font = .systemFont(ofSize: 16, weight: .bold)

        NSLayoutConstraint.activate([
            label.leadingAnchor.constraint(equalTo:
                                            contentView.leadingAnchor,
                                           constant: 20),
            label.centerYAnchor.constraint(equalTo:
                                            contentView.centerYAnchor)
        ])
    }

    required init?(coder aDecoder: NSCoder) {
        super.init(coder: aDecoder)
    }
}
ViewDidLoadはこうなります。
override func viewDidLoad() {
    super.viewDidLoad()
    navigationItem.title = "Shopping List"
    navigationController?.navigationBar.prefersLargeTitles = true
    tableView.register(ProductCell.self,
                       forCellReuseIdentifier: "ProductCell")
    tableView.register(SectionHeader.self,
                       forHeaderFooterViewReuseIdentifier: "SectionHeader")
    createSnapshot()
}
次はFoodTypeに追加されたStandardFoodの代わりに「果物」と「肉」のcaseを使用したいと思います。
enum FoodType {
    case fruit
    case meat
}
最後にfoodArrayに商品のtypeを追加したいですが、FoodTypeが不明なので、まずFoodのstructを改善しましょう。
struct Food: Hashable {
    let name: String
    let type: FoodType
}
そうすることによって、foodArrayの中にtypeで分けることができます。
private let foodArray = [Food(name: "Apples", type: .fruit),
                         Food(name: "Bananas", type: .fruit),
                         Food(name: "Oranges", type: .fruit),
                         Food(name: "Beef", type: .meat),
                         Food(name: "Pork", type: .meat)]
では、もう一度Snapshotの関数を確認しましょう。FoodTypeが追加されましたので、簡単にセクションで分けられるようになると思います。appendSectionsにfruitとmeatのcaseを追加し、foodArrayのアイテムを正しいセクションに入れることができます。
snapshot.appendSections([.fruit, .meat])
snapshot.appendItems(foodArray.map { $0 }.filter { $0.type == .fruit },
                     toSection: .fruit)
snapshot.appendItems(foodArray.map { $0 }.filter { $0.type == .meat },
                     toSection: .meat)
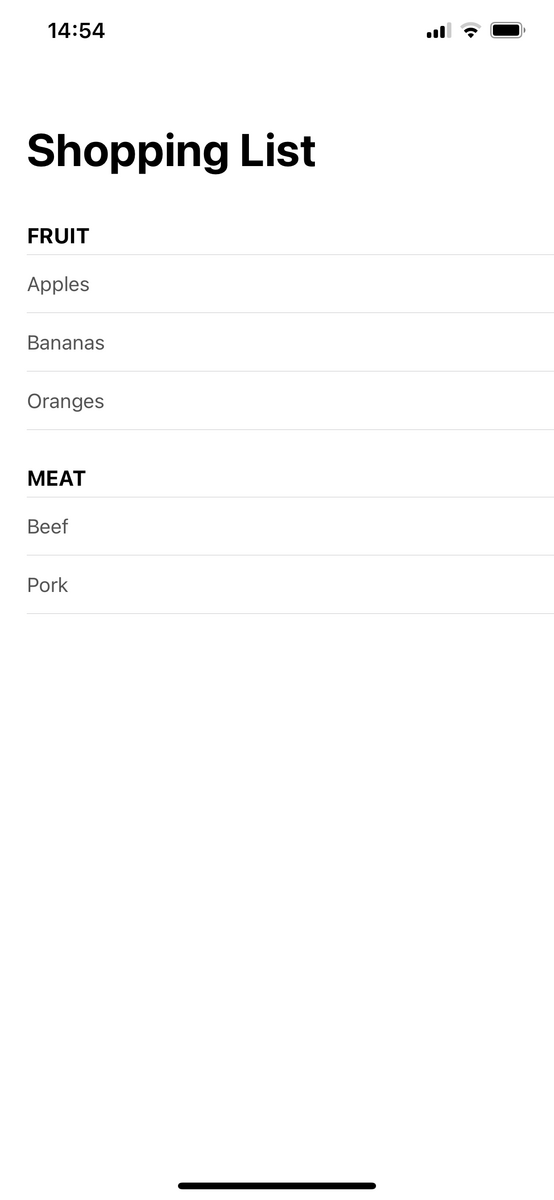
このままで分けましたが、セクションのヘッダはまだ使用していませんので最後のステップで対応しましょう。
まず、FoodTypeにtitleを追加したいと思います。
enum FoodType {
    case fruit
    case meat

    var title: String {
        switch self {
        case .fruit: return "FRUIT"
        case .meat: return "MEAT"
        }
    }
}
最後にUIKitのviewForHeaderInSectionを使用しますが、今回はSnapshotを使用しているので、配列ごとにDataSourceから正しいセクションを得る必要があります。これはUITableViewDiffableDataSourceのsectionIdentifiersで対応できます。
override func tableView(_ tableView: UITableView,
                        viewForHeaderInSection section: Int) -> UIView? {
    let sectionTitle =
        dataSource.snapshot().sectionIdentifiers[section].title
    if let view =
        tableView.dequeueReusableHeaderFooterView(withIdentifier: "SectionHeader")
        as? SectionHeader {
        view.label.text = sectionTitle
        return view
    }
    return nil
}
これだけで結果は以下の通りになります。
まとめ
UITableViewDiffableDataSourceは旧型より便利で、UITableViewを簡単に作成できるし、更新はcreateSnapshotの関数だけでできます。今回作ったTableViewはとてもシンプルでしたが、必要であれば単独セクションかアイテムも更新することができるので、別の機会に説明したいと思います。